I’ve had picture ledges on my brain since seeing these from the Brown Eyed Fox.

These aren’t your picture ledges ala Pottery Barn early 2000’s. I had those in my 1st house — well, not Pottery Barn ledges. I couldn’t afford those. Mine were probably from TJ Maxx. But this more modern take on the picture ledge allows for more layering, less single picture display and also includes some space for loved items.
Anyway, that image and others, like this one from Chris Loves Julia

had my heart (and mind) racing: Where could I put a picture ledge in our house? Then, I found the perfect spot — my upstairs hallway!
I so wish I had a before picture for you, but imagine 3 rows, about 8 pictures in each row, of 8×10 frames with pictures of my kiddos, some recent, and some from babydom (think Picture People, people). I loved looking at all of those precious pictures but the display bothered me. It also wasn’t flexible. Since each picture was hung up individually, I had to either keep adding frames or change out the existing ones. The frames also had a tendency to lean to one side or the other, probably because of the little people in my house running up and down the hallway, displacing them. I knew hanging picture ledges here would be the perfect solution and also add lots of room to grow as my “babies” keep growing too. (Really?? Can’t they stay small forever??)
Then, I found a tutorial from City Farmhouse that Emily from The Wicker House created detailing how to make the beautiful ledges below.

I sent the image and the link to her tutorial to my very talented FIL and asked so kindly if he would make them for me — with some differences. My hallway is long and I wanted my ledges to run almost the entire length of it and I wanted both of my ledges to be the same size, which is about 120 inches. Pretty substantial, uh?
Well, my FIL did not disappoint!

Because of the length (again: 120 inches each), he decided to make 4, 60 inch sections to make it easier to hang.
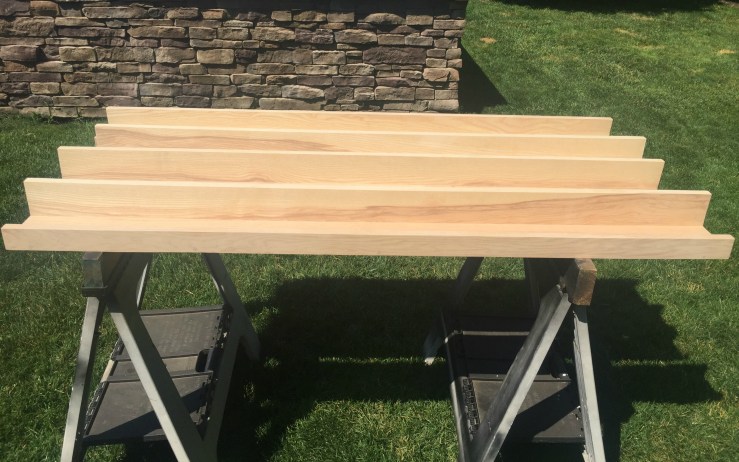
This image shows what they look like from the front, pre-stain and below, post-stain. I originally thought I would stain them like my inspiration photo from The Wicker House but decided to go with something darker after seeing the beautiful wood grain in the Ash wood that my FIL used to make the ledges.
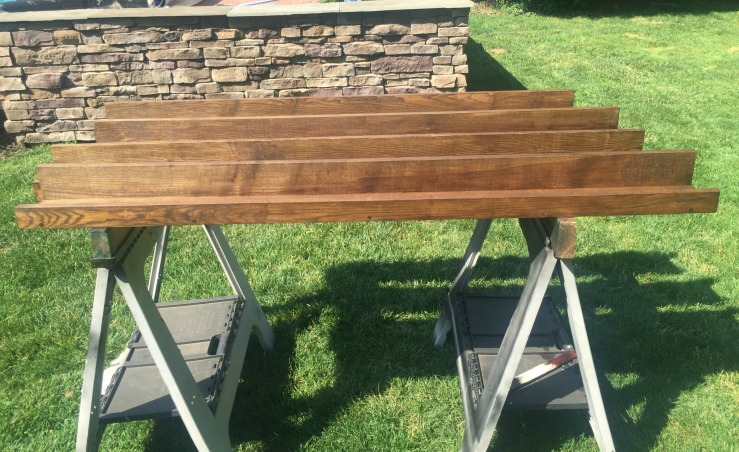
My daughter and I stained all 4 ledges and love the rich finish of the wood. They look even better hanging in my hallway.
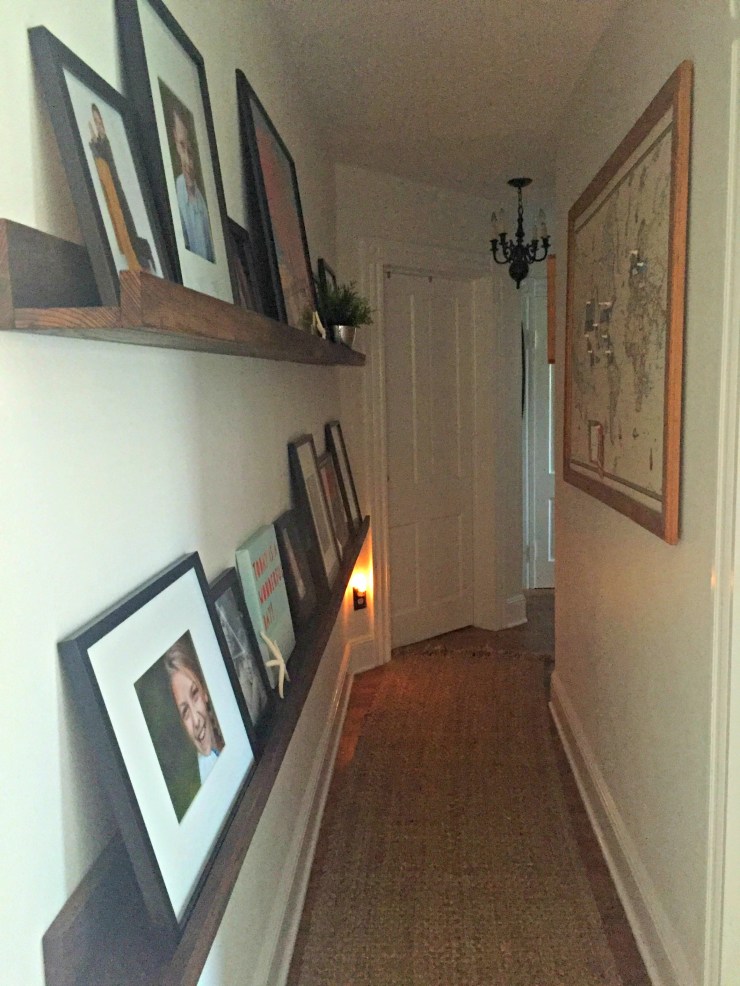
I used some of the 8×10 frames I had from before and also purchased 5 new frames from Target that are larger but have a picture frame matte to 8×10. I also mixed in some things I already had, like the printed canvas, starfish, and another faux plant from Ikea (its mate is in the kids bathroom).
It makes me so happy each time I walk by it which is a good thing because I usually am headed to the laundry room (and I hate doing laundry!) I also am excited about the flexibility of the ledges. I’m sure I’ll be moving things around but it won’t matter because there aren’t any nail holes to contend with which is an endless battle for me when changing up my gallery walls.
My FIL may be willing to share his talent so message me if you want your own. I’ll see what I can do.
I hope you all have a fantastic weekend! It might not feel at all like fall, but I ran to the garden center after work on Friday to grab some mums and cabbage plants. Hoping to get my “Fall on” my front porch. Will share a picture when it’s done!
love, Angie

Larry is the best! Angie, you have such wonderful vision.
LikeLike
So beautiful and flexible. Just think of the holiday possibilities!
LikeLike
So beautiful and flexible. Just think of the holiday possibilities! I’m thinking white birch branches and holly berries just to start…oh my!
LikeLike
I spy itty-bitty Sophie and Jack! 🙂 Love this idea. It’s so nice to know handy people!
LikeLike
That picture of Sophie is one of my favorites!! You have such talent!!
LikeLike